
zopen community - Hands on Workshop
Prerequisites
- A workstation with a terminal to access z/OS UNIX
- Duration: 60 minutes
- Userid and Password to login to the share machine (will be provided)
Introduction (15 minutes)
Welcome to the zopen community Workshop, where we'll delve into how you can take advantage of open-source tools within the z/OS UNIX environment.
z/OS is renowned for its unwavering reliability, security, and speed. However, it's often challenged by the limited availability of readily available open-source software, compared to more common platforms such as Linux or Mac.
This is where the zopen community comes into play. Our primary mission is to enhance the open-source landscape on z/OS. With over 170 successfully ported open source projects, we're committed to making essential open-source tools readily available on z/OS. Importantly, we actively contribute our enhancements back to open-source communities to keep z/OS aligned with industry developments.
In today's session, we'll guide you through practical tasks like downloading and using the open source zopen package manager, installing core tools like Vim, Git, Make and Bash, and even introduce you to the process of porting an external tool (e.g., jq) using the zopen build command.
Module 1: Accessing z/OS UNIX (10 minutes)
Make sure you have access to z/OS system, if not please reach out to:
- Igor Todorovski itodorov@ca.ibm.com or
- Mike Fulton fultonm@ca.ibm.com
On getting access, log in to the z/OS UNIX system using SSH, you'll need to follow these steps:
Open a terminal window. If you're on Windows, it's recommended that you use WSL - wsl installation steps.
If you're on Mac, you can use Terminal or iTerm2 - iterm2 installation steps.
Logging in via SSH: You can use the provided userId and password to log into a z/OS system.
- Here's an example of how to do it:
- ssh yoursid@hostname.com
- NOTE: Replace yourid with the z/OS userid provided and hostname with z/OS host name
- Here's an example of how to do it:
Module 2: Downloading and Installing zopen community Meta Framework (10 mins)
Video guide: (Optional)
- There is a video guide provided here. It can be used as reference as you work through the workshop.
Module 3: Setting up your z/OS environment
- z/OS Open Source tools leverage z/OS Enhanced ASCII support. This support enables automatic conversion between codepages for tagged files. To take advantage of this support, you need to set the following environment variables on z/OS UNIX:
export _BPXK_AUTOCVT=ON
export _CEE_RUNOPTS="$_CEE_RUNOPTS FILETAG(AUTOCVT,AUTOTAG) POSIX(ON)"
export _TAG_REDIR_ERR=txt
export _TAG_REDIR_IN=txt
export _TAG_REDIR_OUT=txtWe recommend adding these environment variables to your .profile or .bashrc startup script.
Required Tools
If you want to contribute and improve the z/OS Open Source Tools
-	You will need the IBM C/C++ compiler on your system. There are two options:
	1. XL CLang
The default compiler is xlclang. You can download it as a web deliverable add-on feature to your XL C/C++ compiler here.
2. ClangYou can install and manage C/C++ for Open Enterprise Languages on z/OS using RedHat OpenShift Container Platform and IBM Z and Cloud Modernization Stack
Alternatively, you can download the pax edition from IBM here.
- If you are building Go projects, you will need the IBM Open Enterprise SDK for Go compiler installed. You can obtain it here.
export PATH="<path_to_compiler>:$PATH"Installing the zopen meta framework
- Create a temp_zopen dir:
mkdir -p ${HOME}/temp_zopenDownload the latest pax file from meta releases
Copy the pax file from the download directory to
${HOME}/temp_zopen/using command:
cp <download_dir>/<meta_pax_file_name> ${HOME}/temp_zopen/cdinto${HOME}/temp_zopen/, the directory you transferred the pax.Z file tocd ${HOME}/temp_zopen/Extract the pax file using command:
pax -rf meta-0.8.1.pax.Z # extract the paxAfter this step, you may delete the
meta-0.8.1.pax.Zfilerm meta-0.8.1.pax.ZNow you can install zopen meta framework using commands:
cd meta-0.8.1 . ./.env zopen init # Follow the instructionsProvide the zopen root directory as follows:
$HOME/zopen_toolsAfter completion, source the zopen-config, using the dot (.) operator, as instructed in the last line from the
zopen initoutput.. $HOME/zopen_tools/etc/zopen-config
Module 4: Installing core tools (10 minutes)
Use the zopen framework to list available tools
zopen list# list the available tools, this will list 100+ tools available under zopen communityzopen list -–installed# list of installed tools
Install your favourite tools
Install vim: (Editor)
zopen install vim -yInstall git: (Source control tool)
zopen install git -yYou will notice that it will install git and its runtime dependencies, bash, ncurses, and others.
Module 5: Using your newly installed zopen community (15 minutes)
Using Bash on z/OS
Bash was installed via Git as it is a dependency for Git. It's recommended that you use Bash on z/OS for the following reasons:
Tab Completion: Bash offers tab completion for efficient command and filename typing, saving time and reducing errors.
Scripting Power: Bash serves as a robust scripting language capable of automating complex tasks, enabling advanced operations with variables, loops, and conditions.
Compatibility: Bash is compatible with the Bourne shell, allowing seamless migration of existing scripts without the need for extensive rewriting.
To invoke bash, type:
bashYou have now entered the bash shell.
Type in
ls <tab>will auto-complete and list all files/directories in your current working directory.
Using Git on z/OS
Skip the steps below if you have a github.com userID, otherwise follow the below steps.
a. Login to github.com and click on Sign up, towards the top right corner.

b. Provide the details related to preferred email id.

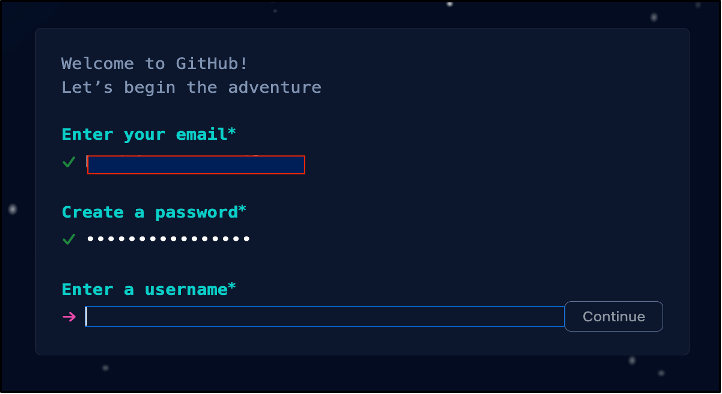
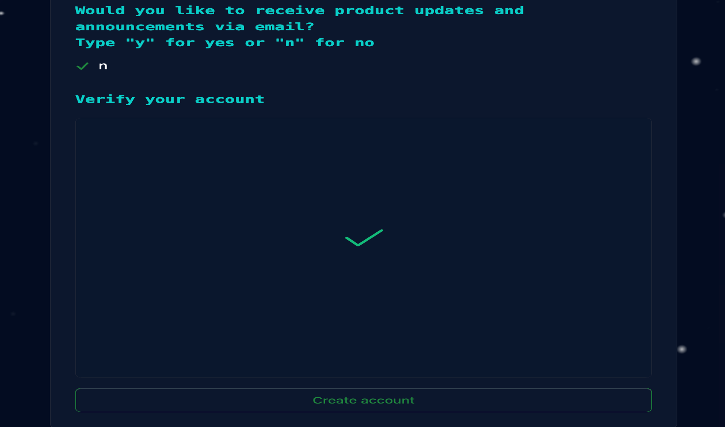
c. Enter the preferred password, username, verify your account and click on create account.
d. Further provide your details and click continue:

e. Select the first free option, scroll down and click on continue for free:

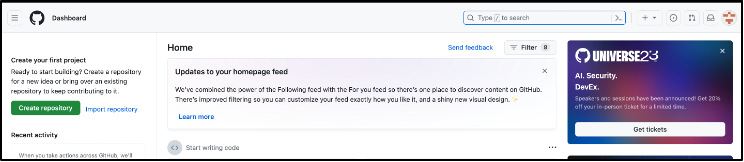
f. Then you will land on your home page as shown below:
Module 6: Building existing zopen community (20 mins)
Now that you've gained some experience with using the zopen community, let's attempt to build an existing open source project, Git.
Create a directory dev under $HOME/temp_zopen:
mkdir -p $HOME/temp_zopen/dev cd $HOME/temp_zopen/devClone the gitport repository and change to the gitport local workspace as follows:
git clone https://github.com/zopencommunity/gitport cd gitportYou will notice that there are several files, and most notably, the
buildenvconfiguration. This file instructszopen buildon how to build thegittool.For more details on the
buildenvconfiguration, visit https://zopencommunity.github.io/meta/#/Guides/Porting.(As mentioned in Module 3, ensure the path to the compiler is set.)
Now, let's attempt to build gitport:
zopen build -vvIt completes build and installation as shown below:

After approximately 10 minutes for `git` build, test and install.
Module 7: Porting a new open source tool with zopen community (20 mins)
Now that you understand the build process, let's attempt to port an open source tool to z/OS by leveraging zopen generate.
Prerequisites : Setting up ssh on z/OS
For this step, you will be contributing your changes to github. It is recommended that you setup an SSH key pair to avoid logging in everytime you access the remote repository.
Here are the basic steps to create an SSH key pair on z/OS:
Open a terminal window.
Generate the SSH Key Pair: To create your SSH key pair, enter the following command:
ssh-keygenYou'll be prompted to specify a file name for your key pair. Provide "/u/<userid>/.ssh/id_rsa "as input, but you have the option to choose a different name if you prefer.
Set a Passphrase (Optional but Recommended): You will also be given the option to set a passphrase for your key pair. While this step is optional, it's highly recommended as it adds an additional layer of security to your SSH connection. If you choose to set a passphrase, you'll need to enter it during SSH authentication.
Example:
Enter file in which to save the key "$HOME/.ssh/id\_rsa): "$HOME/.ssh/id_rsa" Enter passphrase (empty for no passphrase): Enter same passphrase again:The key pair will be generated and saved in the .ssh directory within your home directory. The private key will be saved as id_rsa (or the name you specified), and the corresponding public key will be saved as id_rsa.pub.
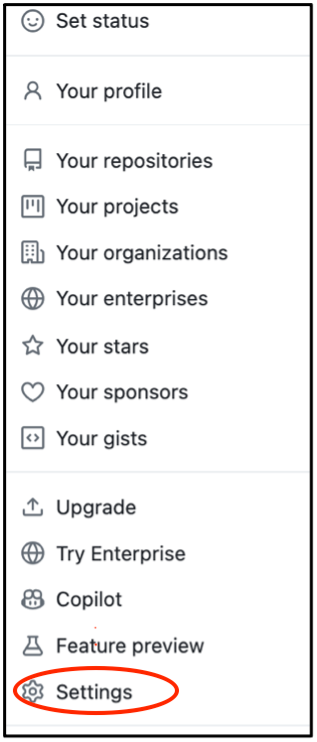
Example output: Your identification has been saved in "$HOME/.ssh/id_rsa. Your public key has been saved in "$HOME/.ssh/id_rsa.pub.Go to you github.com page and on top right corner click on you profile icon to get below drop down:

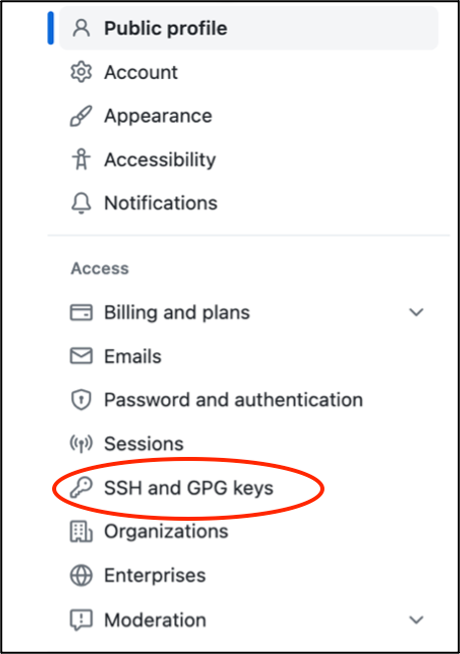
Click on Settings and select SSH and GPG Keys on left:
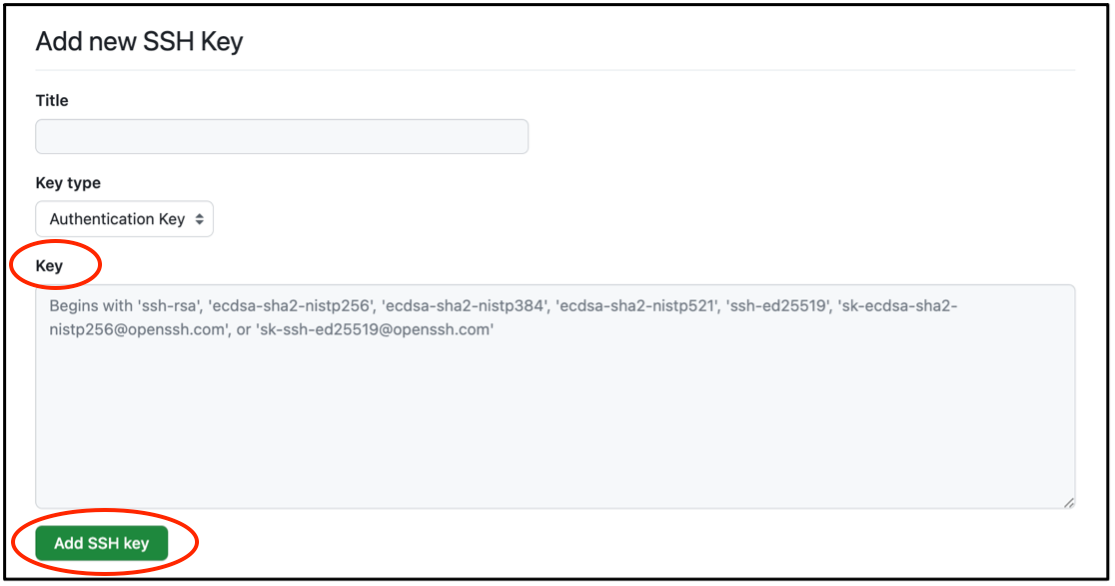
Click on New SSH Key button:

Copy the id_rsa.pub key generated above and paste it in the key field and click add key:
Please note that the precise commands and prompts may vary slightly depending on your operating system and the version of SSH you are using.
We will choose jq, a lightweight and flexible json parser.
Begin first by generating a port template project by entering the following command:
zopen generatezopen generatewill ask you a series of questions. Answer them as follows:Generate a zopen project... * What is the project name? jq * Provided a description of the project: A jq parser * Valid categories: security development language ai core editor source_control networking * What categories does the project fit under? (delimit with a space): development * Provide the community license to use for jq's patches: (select from key agpl-3.0 apache-2.0 bsd-2-clause bsd-3-clause bsl-1.0 cc0-1.0 epl-2.0 gpl-2.0 gpl-3.0 lgpl-2.1 mit mpl-2.0 unlicense) unlicense * Enter jq's stable release source url: (Specify a Git or Tarball URL. If none, press enter) * Enter jq's zopen community build dependencies for the stable build: (Enter multiple dependencies using spaces. E.g: zoslib make grep) * Enter jq's dev-line source url: (Specify a Git or Tarball URL. If none, press enter) git@github.com:stedolan/jq.git * Enter jq's zopen community build dependencies for the dev build: (Enter multiple dependencies using spaces. E.g: zoslib make grep) git make autoconf * Enter the default build line: (stable or dev) dev * Enter jq's zopen community runtime dependencies: (example: bash) Generating jqport zopen project jqport/buildenv created jqport/README.md created jqport/.gitignore created jq project is ready! jqport/ Create patches under the jqport/patches directory Run zopen build to build jqport Contact Igor Todorovski (itodorov@ca.ibm.com) to create https://github.com/zopencommunity/jqport.gitChange your current directory to the jqport directory:
cd jqportYou will notice several files:
- README.md - A description of the project
- buildenv - The zopen configuration file that drives the build, testing, and installation of the project.
- cicd-dev.groovy - The CI/CD configuration file used in the Jenkins pipeline.
For more information, please visit the zopen build README
Note:
zopen buildsupports projects based in github repositories or tarball locations. Since autoconf/automake are not currently 100% functional on z/OS, we typically choose the tarball location because it contains aconfigurescript pre-packaged. Let's go ahead and do this forjq.In the
buildenvfile, you'll notice the following contents:export ZOPEN_DEV_URL="git@github.com:stedolan/jq.git" export ZOPEN_DEV_DEPS="git make autoconf" export ZOPEN_CATEGORIES="development" export ZOPEN_BUILD_LINE="DEV" zopen_check_results() { dir="$1" pfx="$2" chk="$1/$2_check.log" # Echo the following information to gauge build health echo "actualFailures:0" echo "totalTests:1" echo "expectedFailures:0" echo "expectedTotalTests:1" } zopen_get_version() { # Modify to echo the version of your tool/library # Rather than hardcoding the version, obtain the version by running the tool/library echo "1.0.0" }ZOPEN_STABLE_DEPS: are used to identify the non-standard zopen community dependencies needed to build the project.
zopen_append_to_env()can be used to add additional environment variables outside of the normal environment variables. (e.g. PATH, LIBPATH, MANPATH)Similarly,
zopen_append_to_zoslib_env()can be used to set program specific environment variables. It accepts the following format: envar|action|value Where envar is the environment variable, action is either set, unset, or prepend, and value is the environment variable value. The stringPROJECT_HOMErepresents a special value and is replaced with the root path of the project"To help gauge the build quality of the port, a
zopen_check_results()function needs to be provided inside the buildenv. This function should process the test results and emit a report of the failures, total number of tests, expected number of failures and expected number of tests to stdout as in the following format:actualFailures:<numberoffailures> totalTests:<totalnumberoftests> expectedFailures:<expectednumberoffailures> expectedTotalTests:<expectednumberoftests>The build will fail to proceed to the install step if totalTests is less than expectedTotalTests or actualFailures is greater than expectedFailures.
Here is an example implementation of zopen_check_results():
zopen_check_results()
{
	chk="$1/$2_check.log"
	failures=$(grep ".* Test.*in .* Categories Failed" ${chk} | cut -f1 -d' ')
	totalTests=$(grep ".* Test.*in .* Categories Failed" ${chk} | cut -f5 -d' ')
	cat <<ZZ
	actualFailures:$failures
	totalTests:$totalTests
	expectedFailures:0
	expectedTotalTests:1
	ZZ
}
Next, we can go ahead and test our build. Run the following:
zopen build -vThe
-voption above specifies verbose output.We get the following error:
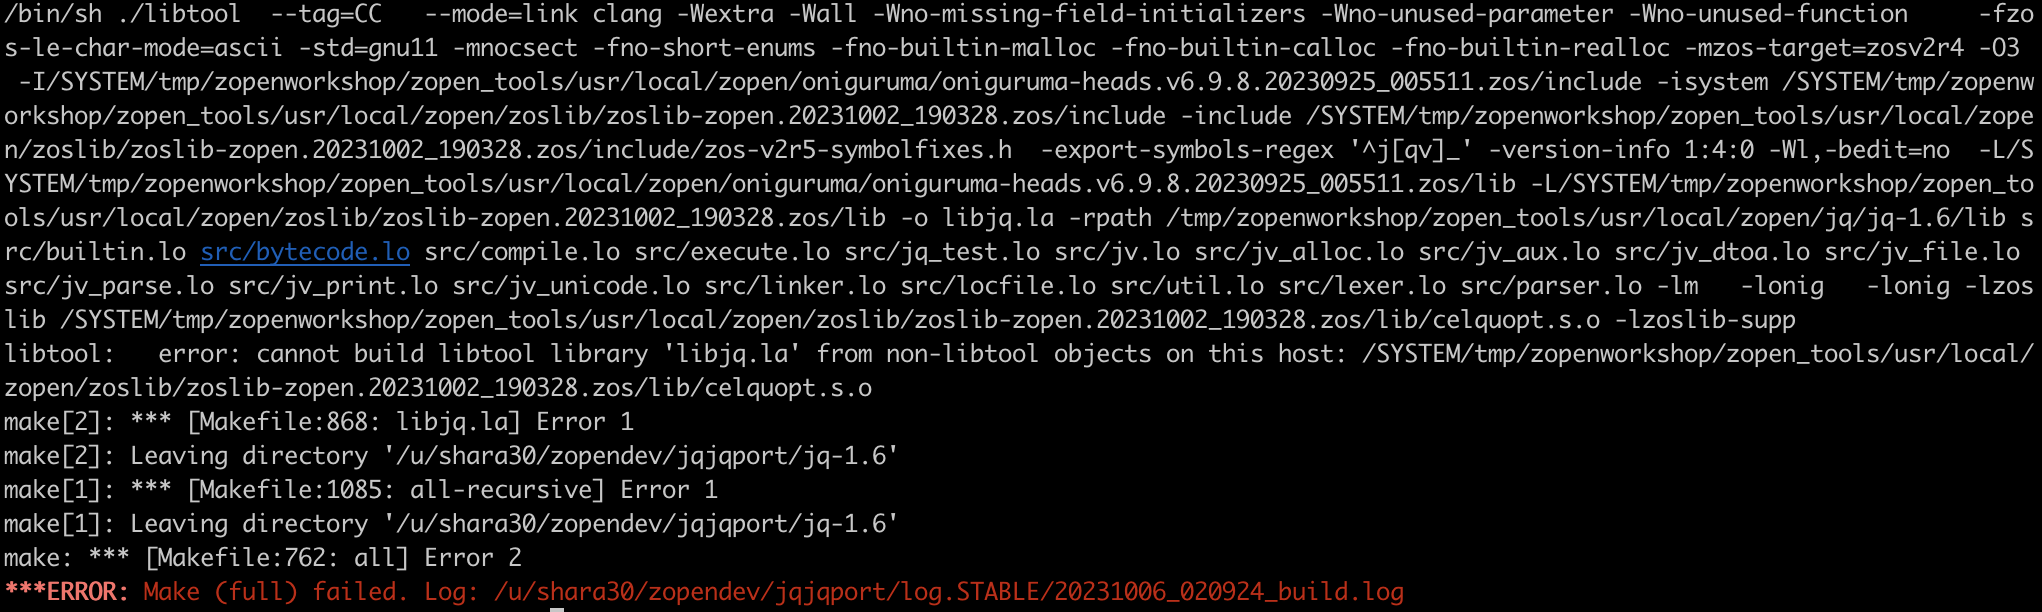
We need the following patch for jq to build on z/OS: (to handle all the interlibrary dependencies passed with no checks)
openedition) lt_cv_deplibs_check_method=pass_all ;;Once finished, you will notice that your project was built and installed under
<zopen_root_fs>/usr/local/zopen/jq/jq.Create patches:
Navigate to jqport directory.
cd jqport/jq-1.6 git statusYou will notice that the file configure is modified.
Now create the patch using following command:
git diff configure > ../patches/configure.patchYou can commit this change back to the repo by using the installed git.
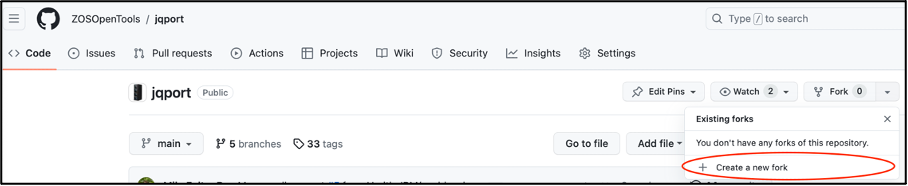
Create a fork of jqport.
- Click on drop down next to fork button:

Click on Create a new fork from drop down:
Fill Data and click on Create fork button:

You can now use the URL from the "code" drop down option:
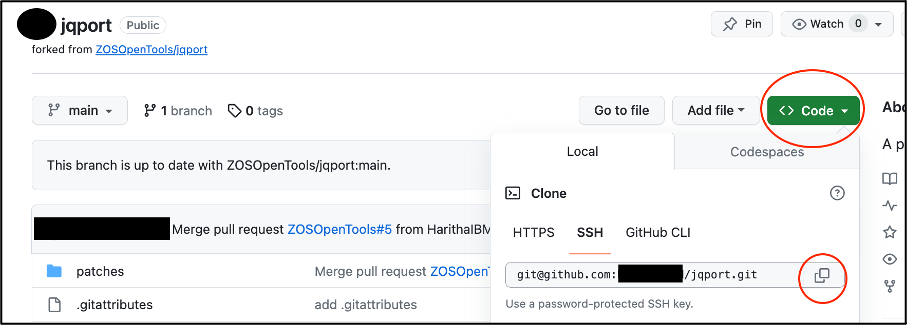
Now, let's use Git to clone a remote repository:
git clone git@github.com:<userName>/jqport.gitThis will clone the remote repository, jqport, to your local z/OS UNIX system under the directory
jqport. Change to the jqport directory:cd jqportCheck the commit log history:
git logScroll up or down using the arrow keys on your keyboard
Now let's make a change. We will use
vimto edit a file locally and make a change. vim the README.md file:vim README.mdNow edit the file by pressing i to enter insert mode:
iNow start typing text. Once you are done, press the
escapekey. You have now exited insert mode. To save the file, press::wqNow, let's use git to check what's different:
git diffYou should see your changes reflected in the view.
Commit your changes.
git add README.md git commit -a README.md -m "My changes" git pushOnce you've committed your change, typically the next step is to push your changes to remote.
How to get involved?
Become a part of the z/OS Open Source Technology community either as a developer or a consumer.
- As a developer:
- If you'd like to contribute as a consumer of these tools, you can start by visiting this link
What's next (5 minutes)
If you're interested in participating further, we hold regular meetings to explore the latest advancements in zopen community via the z/OS Open Source Guild Meetings
We're dedicated to building a community of z/OS enthusiasts who collaborate and share their work on GitHub through the "z/OS Open Source Guild". Feel free to also participate in our discussions. For a list of existing issues and how you can get involved, visit issues.